Digital Diary with Angular (Tutorial Part-1)
This step-by-step guide will teach you how to create a Digital Diary App using Angular, featuring tasks, notes, and reminders.
Tutorial Steps
Download Tutorial
Step 1 – Create Angular App
Run the following command to create a new Angular project:
ng new digital-diary --no-standalone --routing --ssr=falseRun the following command to install jquery, popperjs, and bootstrap :
cd digital-diary
npm install jquery --save
npm install @popperjs/core --save
npm install ngx-bootstrap bootstrap@latest
ng add ngx-bootstrap
Run the following command to install Angular Ant Design:
ng add ng-zorro-antdYour Application Folder Structure will be like:
src
├── app
│   ├── home
│   │   ├── home.component.html
│   │   ├── home.component.css
│   │   └── home.component.ts
│   ├── model
│   │   ├── notes.ts
│   │   ├── reminders.ts
│   │   └── tasks.ts
│   ├── notes
│   │   ├── notes.component.html
│   │   ├── notes.component.css
│   │   └── notes.component.ts
│   ├── reminders
│   │   ├── reminders.component.html
│   │   ├── reminders.component.css
│   │   └── reminders.component.ts
│   ├── services
│   │   └── data.service.ts
│   ├── tasks
│   │   ├── tasks.component.html
│   │   ├── tasks.component.css
│   │   └── tasks.component.ts
│   ├── app.component.html
│   ├── app.component.ts
│   ├── app.module.ts
│   ├── app-routing.module.ts
│
├── index.html
├── style.css
Step 2 – Project Setup
Copy and Paste following code styles section of angular.json file:
"./node_modules/bootstrap/dist/css/bootstrap.min.css"

Copy and Paste following code script section of angular.json file:
"./node_modules/jquery/dist/jquery.min.js",
"./node_modules/bootstrap/dist/js/bootstrap.bundle.min.js"
Step 3 – Home Component
Create Home Component with the following command:
 ng generate component --skip-tests=true home
Copy and paste the following html block in home.componenet.html:
    <div class="text-center mt-5">
      <h1 class="display-4">Welcome to Digital Diary</h1>
      <p class="lead">Manage your notes and tasks effortlessly.</p>
      <button routerLink="/notes" class="neumorphic-btn me-3">Go to Notes</button>
      <button routerLink="/tasks" class="neumorphic-btn me-3">Go to Tasks</button>
      <button routerLink="/reminder" class="neumorphic-btn">Reminder</button>
    </div>
Copy and Paste the following code to app.component.html to Ensure Routing:
<router-outlet></router-outlet>
Step 4 – Create Notes Component
Create Note Component with the following command:
ng generate component --skip-tests=true notes You will get:
notes.component.html
notes.component.css
notes.component.ts
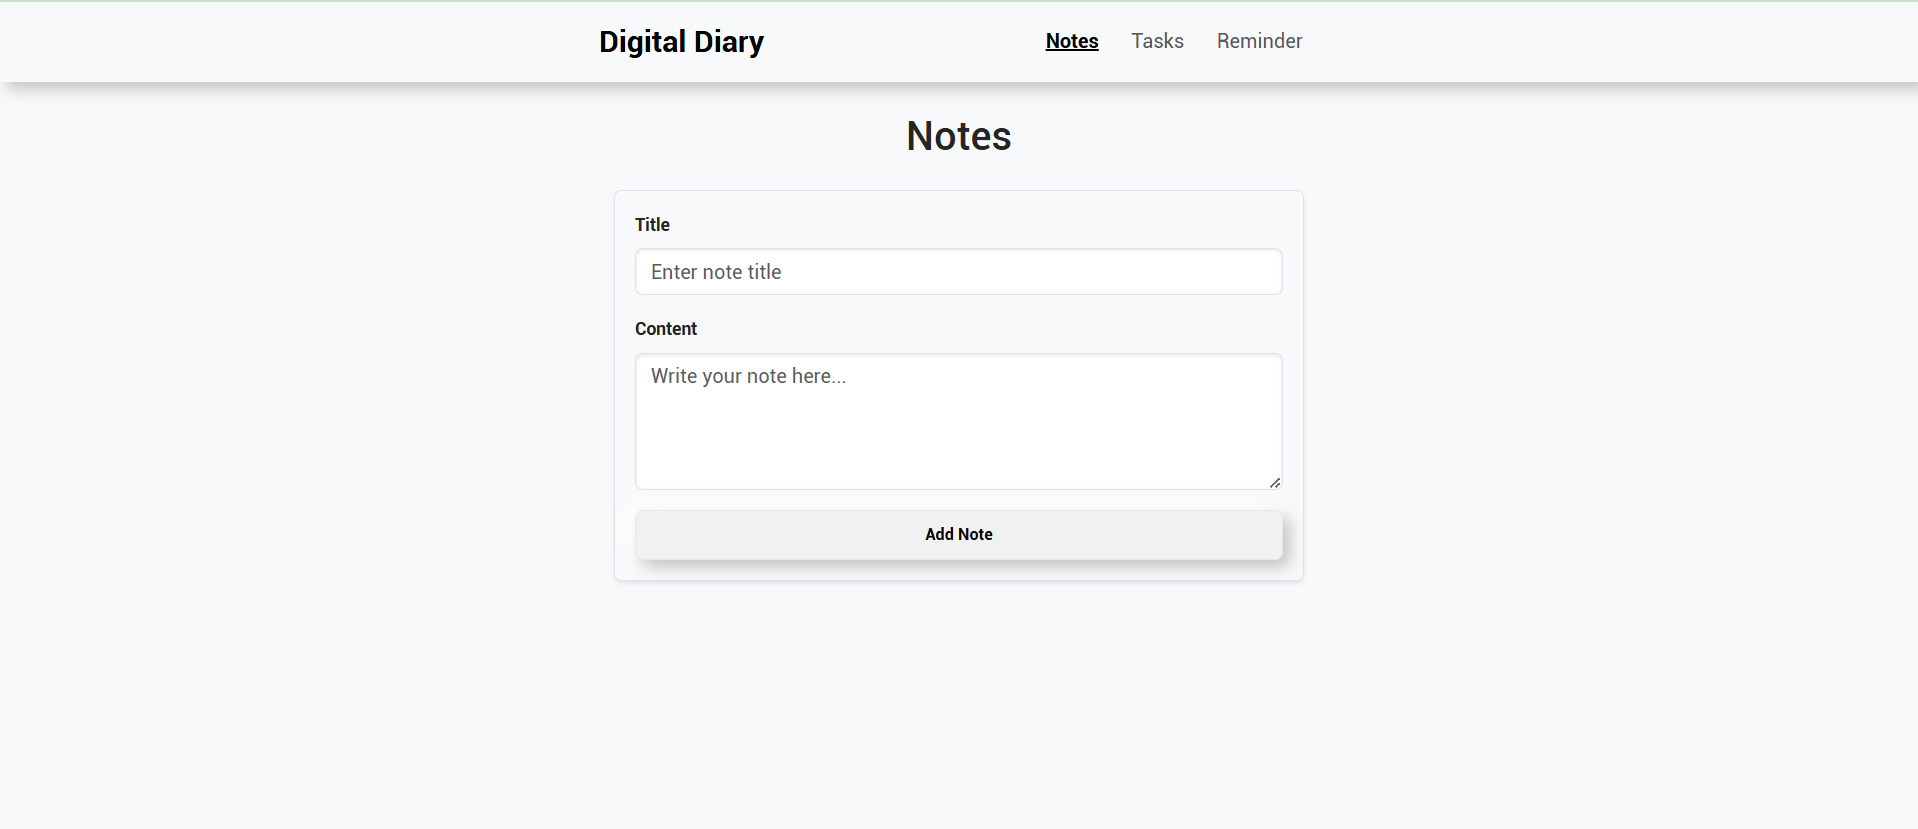
Copy and Paste the below code to notes.component.html:
<div class="container mt-4">
  <h2 class="text-center mb-4">Notes</h2>

  <!-- Form to add a new note -->
  <form (ngSubmit)="addNote()" class="p-3 rounded shadow-sm bg-light">
    <div class="mb-3">
      <label for="noteTitle" class="form-label fw-bold">Title</label>
      <input
        type="text"
        [(ngModel)]="newNote.title"
        name="noteTitle"
        id="noteTitle"
        class="form-control"
        placeholder="Enter note title"
        required
      />
    </div>
    <div class="mb-3">
      <label for="noteContent" class="form-label fw-bold">Content</label>
      <textarea
        [(ngModel)]="newNote.content"
        name="noteContent"
        id="noteContent"
        class="form-control"
        placeholder="Write your note here..."
        rows="4"
        required
      ></textarea>
    </div>
    <button type="submit" class="neumorphic-btn w-100">Add Note</button>
  </form>

  <!-- List of saved notes -->
  <div *ngFor="let note of notes; let i = index" class="card mt-3 shadow-sm">
    <div class="card-body">
      <h5 class="card-title text-primary">{{ note.title }}</h5>
      <p class="card-text">{{ note.content }}</p>
      <p class="text-muted small">Created on: {{ note.date }}</p>

      <button class="neumorphic-btn delete" (click)="deleteNote(i)">Delete</button>
    </div>
  </div>
</div>
Copy and Paste the below code to notes.component.ts :
import {Component, OnInit} from '@angular/core';
import {DataService} from "../services/data.service";
@Component({
selector: 'app-notes',
templateUrl: './notes.component.html',
styleUrl: './notes.component.css'
})
export class NotesComponent implements OnInit {
notes: any[] = [];
newNote = { id: 0, title: '', content: '', date: '' };
constructor(private dataService: DataService) {}
ngOnInit(): void {
// Load saved notes from LocalStorage when the component initializes
this.notes = this.dataService.getNotes();
}
addNote(): void {
if (this.newNote.title.trim() && this.newNote.content.trim()) {
// Set unique ID and current date
this.newNote.id = new Date().getTime();
this.newNote.date = new Date().toLocaleString();
// Save the note to LocalStorage
this.dataService.addNote({ ...this.newNote });
// Refresh the notes list
this.notes = this.dataService.getNotes();
// Clear the input fields
this.newNote = { id: 0, title: '', content: '', date: '' };
} else {
alert('Please provide both title and content for the note.');
}
}
deleteNote(index: number) {
// Remove the note from the array
this.notes.splice(index, 1);
// Update localStorage to reflect the deletion
localStorage.setItem('notes', JSON.stringify(this.notes));
}
} Step 5 – Create Model for Notes
Run following Command to create model for Notes:
ng generate interface model/notes You will get notes.ts file in model directory:
Copy and Paste the following code to notes.ts:
export interface Notes {
id: number;
title: string;
content: string;
date: string;
} Step 6 – Create Service for Notes
Run following Command to create data-service to Implement Logic for Notes:
ng generate service services/data --skip-tests=true You will get data.service.ts. Copy and Paste following code to data.service.ts for notes data logic:
import { Injectable } from '@angular/core';
@Injectable({
providedIn: 'root'
})
export class DataService {
private NOTES_KEY = 'notes'; // Key for LocalStorage
// Fetch all saved notes
// private TASKS_KEY: string;
getNotes(): any[] {
return JSON.parse(localStorage.getItem(this.NOTES_KEY) || '[]');
}
// Save the entire list of notes
saveNotes(notes: any[]): void {
localStorage.setItem(this.NOTES_KEY, JSON.stringify(notes));
}
// Add a new note to the existing list and save
addNote(note: any): void {
const notes = this.getNotes();
notes.push(note);
this.saveNotes(notes);
}
} Step 7 – Angular Routing
Copy and Paste the following code to app-routing.module.ts at import section:
 import {HomeComponent} from "./home/home.component";
import {NotesComponent} from "./notes/notes.component";
Copy and Paste the following code to app-routing.module.ts "const routes: Routes" section:
{ path: '', component: HomeComponent },
{ path: 'notes', component: NotesComponent },
Step 8 – Add CSS
Copy and Paste the following CSS code to style.css:
/* Container Spacing */
.button-container {
margin-top: 50px;
}
/* Neumorphic Button Style */
.neumorphic-btn {
color: #090909;
padding: 0.7em 1.7em;
font-size: 14px;
border-radius: 0.5em;
background: #f1f1f1;
cursor: pointer;
border: 1px solid #e8e8e8;
transition: all 0.3s;
box-shadow: 6px 6px 12px #c5c5c5, -6px -6px 12px #ffffff;
}
.neumorphic-btn.delete {
color: white;
background: #ff4d4d; /* Red background */
border: 1px solid #d43f3f; /* Darker red border */
box-shadow: 2px 2px 4px #c03838, -2px -2px 4px #ff6a6a; /* Red shadows */
padding: 0.3em 1em; /* Smaller padding */
font-size: 12px; /* Slightly smaller font */
border-radius: 0.3em; /* Smaller border radius */
transition: all 0.2s;
}
.neumorphic-btn.delete:hover {
background: #e60000; /* Darker red on hover */
box-shadow: 3px 3px 9px #b30000, -3px -3px 9px #ff3333;
}
.neumorphic-btn:hover {
border: 1px solid white;
}
.neumorphic-btn:active {
box-shadow: 4px 4px 12px #c5c5c5, -4px -4px 12px #ffffff;
}
/* Add Margin Between Buttons */
.me-3 {
margin-right: 1rem; /* Logical space between buttons */
}
/* Responsive Design for Small Screens */
@media (max-width: 768px) {
.neumorphic-btn {
font-size: 13px;
padding: 0.6em 1.4em;
}
.button-container {
margin-top: 30px;
}
}
/* General container styling */
.container {
max-width: 600px;
}
/* Form styling */
form {
border: 1px solid #dee2e6;
background-color: #f8f9fa;
}
input,
textarea {
font-size: 0.9rem;
border-radius: 6px;
box-shadow: inset 0 1px 3px rgba(0, 0, 0, 0.1);
}
input:focus,
textarea:focus {
border-color: #0d6efd;
box-shadow: 0 0 4px rgba(13, 110, 253, 0.25);
}
/*Button styling */
button {
font-size: 0.1rem;
padding: 0.6rem;
border-radius: 6px;
font-weight: bold;
}
/* Card styling */
.card {
border-radius: 8px;
border: 1px solid #dee2e6;
}
.card-title {
font-size: 1.2rem;
margin-bottom: 0.5rem;
}
.card-text {
font-size: 0.95rem;
line-height: 1.5;
}
body {
font-family: 'Roboto', sans-serif;
background-color: #f8f9fa;
}
.navbar {
box-shadow: 6px 6px 12px #c5c5c5, -6px -6px 12px #ffffff;
}
.navbar-brand {
font-size: 1.5rem;
font-weight: bold;
}
.nav-link {
font-size: 1rem;
margin: 0 5px;
}
.nav-link.active {
font-weight: bold;
text-decoration: underline;
}
h1.display-4 {
font-weight: bold;
color: #343a40;
}
.lead {
font-size: 1.2rem;
color: #6c757d;
}